Share PIX EZ
Create a Connection
Share PIX EZ is easy to use. Start the app and you will see this screen. You can do this on either an Android phone, Android tablet, iPhone or iPad. We will start using an Android device and add a connection to an iPhone.

Click the button labelled ADD CONNECTION.
You will now see this screen.

From here, click the button labelled I WANT TO ADD A NEW CONNECTION.
This will now open up the screen so it looks like this.
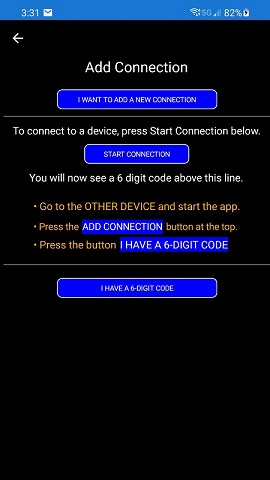
Click the button labeled START CONNECTION.
This will obtain a code so you can connect to another device.
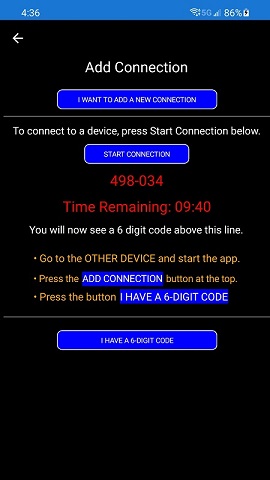
You have 10 minutes to have the other device connect to this one. The other device can be any of the supported devices. That means you can connect your Android to an iPhone or your phone to a tablet or any combination of supported Android or Apple devices.
Connecting to the Other Device
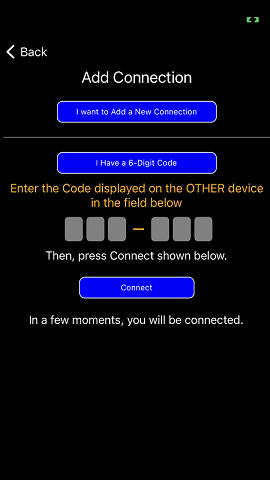
We are going to connect the Android phone above to an iPhone. Start the app on your iPhone and click the ADD CONNECTION button.

You see the same menu you saw before. But this time, you press the button labelled
I HAVE A 6-DIGIT CODE
The menu opens up and
you see a spot to enter the code. The code from above was 498-034 - enter it in
the field on the screen.
After you have
entered the code on the screen, press the button labelled CONNECT
In just a few seconds, you should see that you are now connected!
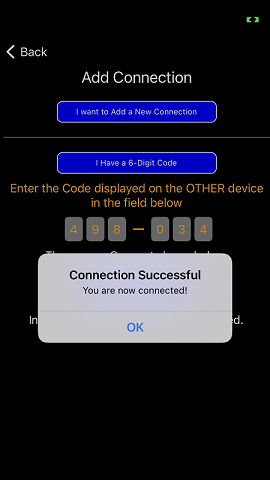
Press OK and return to the previous screen.
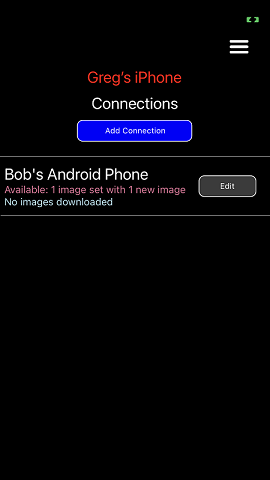
You will now see the device in the list on the page. All devices you are connected to are listed here. When pictures come in, the device they came from is highlighted and moved to the top.
Sending Pictures and Videos to the
Other Device
To send a picture to the other device, start at the Device List menu titled CONNECTIONS and press the device listed in the list.

We call a single transmission of images and videos and
Image Set. After clicking the device information, you go to the page
where you can view Image Sets sent to you and send new Image Sets to another
person.

In Android, you will see the option to send either pictures or videos. In the iPhone you can do both from one place so you will only see a button marked SELECT PICTURES TO SEND.
Select the button to send the items you want to and it opens your Gallery (on Android) or your Pictures (on iPhone) where you can select as many pictures or videos as you like.
In this example, on an Android device, it opens Gallery where I can choose pictures to send. In Android, selecting one image will return you to the menu where you can send the image. Long clicking on the image will change the menu so you can mark multiple images. Press Done on the top right when done.
On iPhone, you will always be in multiple select mode. Select the images and videos you want to send and press Done on the top right on those devices.

After you have marked the ones you want, press Done on the top right and it proceeds to the page where you can review the pictures you are thinking of sending.
In this page, it shows the images you have selected below (a single picture is taken from any videos to display here but the full video will be transmitted).
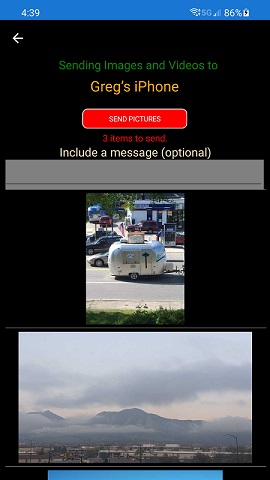
If you are OK with it, press the button SEND PICTURES and they will be sent to the other device.
That all! The other device will now show the image set where you can choose to add those pictures to your Gallery in Android or Pictures on the iPhone.
Additional Settings
There are two more places to change settings. At the top right of the startup menu, there is an icon you can click that looks like this:

Clicking that brings up this menu.
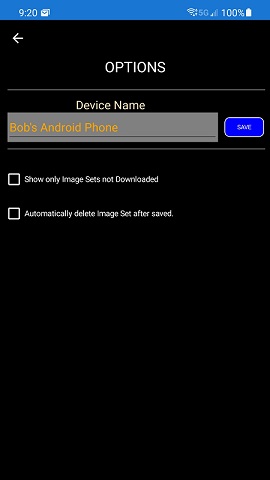
Your device has a name such as Bobs Android Phone. That name is what the other device displays when you are first connected. You can change it here.
Show only Image Sets not Downloaded. When you receive an Image Set, it will be displayed saying whether you have downloaded it to your Gallery or Photos or not. Clicking this will hide those that have already been downloaded to reduce clutter.
Automatically Delete Image Sets after Saved. If this is checked, the Image Set will be completely removed from this app when the items are saved (but the pictures and videos saved will be in your gallery).
Connection Settings
In the Connection Menu, shown below, you pick the connection where items are to be sent.
Clicking the EDIT button however opens the menu to one more set of options.
This shows the options for this connection.
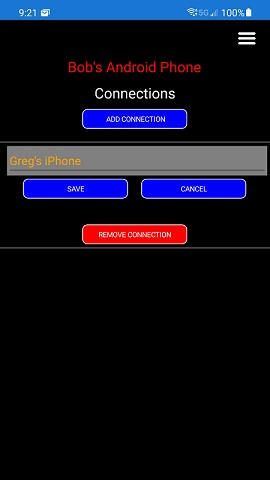
You can rename the connection so that it shows something different on the Connection screen.
You can also REMOVE CONNECTION. Pressing that button will cause the app to pop up and ask you to confirm where you can choose to remove this connection.